Thanks for joining me! Today’s post is a lesson in megapixels, and a comparison of my work captured through a camera and a scanner. We’ll also cross an item off of last week’s checklist!
I’m going to dive right in!
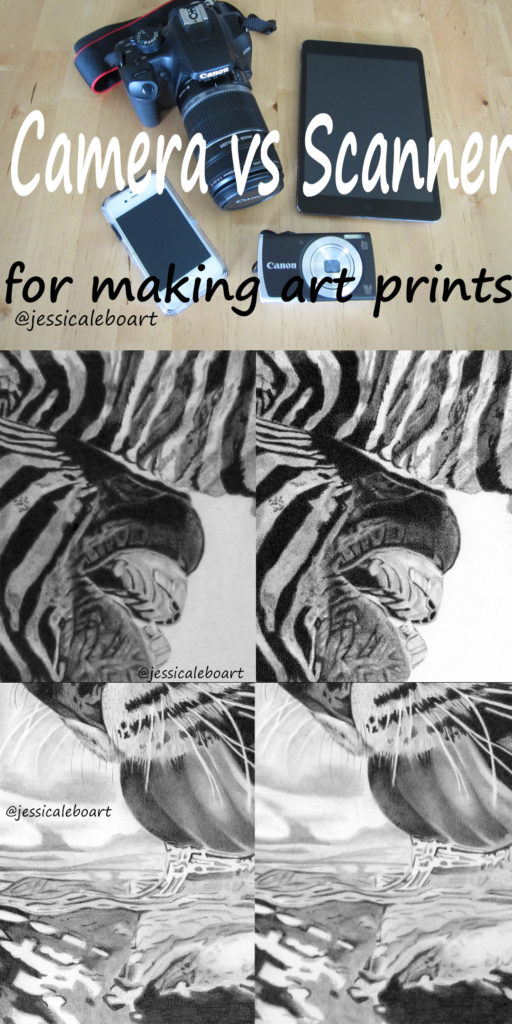
As I said previously, these are the camera options I had to start with:
I dismissed the phone, iPad, and point and shoot camera because of obvious quality issues with the first two, and because all of my research said not to use a point and shoot. The thing that I didn’t research enough was what my DSLR was actually capable of. In case the term is new to you, DSLR is an abbreviation for digital single-lens reflex camera. My way oversimplified explanation of the difference between this type of camera and a point and shoot is the option for interchangeable lenses, the ability to have complete control over the settings, and an image stabilization feature.
Remember when I said I don’t replace things just because they are old. They have to break, or die, or have holes, or rot?
Well, this comes into play here because my “good” camera is probably 7 old. At the time I bought it, it was a decent entry level camera. Now, well it’s a bit outdated, and I hadn’t really realized it. It is a 10 megapixel camera. The point and shoot in this photo is only 3 years old, but it is has 17 megapixels. I realize now after learning a lot that I probably would have been better off using the point and shoot.
The major reason for this is the number of megapixels and how they translate to printing. I’m going to try and keep this super simple for a couple of reasons. The first, I find it to be quite detailed and a bit boring and although I understand how it all works now, I’m not sure that I’m the best person to go into great depths trying to explain it to someone else. The second reason being, I want to move on to the part where you can actually start getting your pictures onto the computer! The fun stuff!
(Just a side note here. There are a lot of different things that go into the making of a good camera. Basing everything on megapixels is not at all accurate. But I’m using this for my comparison because I’m keeping things incredibly oversimplified on purpose.)
A pixel is a dot of information. A megapixel is a million of those dots. A 10 megapixel camera would record 10 million dots, a 17 megapixel would record 17 million dots, and you get the idea. The camera records these in rectangles. Below is a quick reference chart of the resolution depending on megapixels.
| MP | W | H |
| 10 | 3872 | 2592 |
| 12 | 4290 | 2800 |
| 16 | 4920 | 3264 |
| 18 | 5184 | 3456 |
(If you don’t know what how many megapixels your camera has, right click on a picture you have taken with the camera and click on properties. Under the details tab it will tell you the dimensions. Then you can use the chart above to figure it out. Or you could read the cameras manual if you still own it and know where it is.)
These numbers are important in determining what size of prints you can make. There are a ton of different charts out there that are supposed to give you guidelines on this. I checked into it and many of these charts said that a 10 megapixel camera produces really good results for 11×14 prints. In fact I’m looking at charts right now that say you should be able to print 30×20 prints at good quality with a 10 megapixel camera.
There are literally tons of these charts on the internet. If you want to have a look at some type in: megapixel dimensions chart, or megapixel print size chart into Google. A lot of results will come up. Some of them are very similar but, a lot of them are wildly different. Which ones are correct? I only know what my experience says.
Step back for one minute. My goal with making prints was never to have a bunch of different sizes. All along my intentions were to make my prints the same size as the originals. Or pretty close. Sometimes the paper is 13.75×10.75, but you get what I mean, right?? I also planned to do greeting cards. This has always just been a personal preference thing. There’s nothing wrong with doing multiple sizes, in fact there are a lot of good reason for it, but for me I just wanted original sizes.
So my research said my DSLR was good enough. I believed it. Then I saw the prints. The first prints I had made were 11×14. They were blurry. They were also terrible in other ways, but let’s address one issue at a time. It’s really hard to tell on the computer if your print is going to be blurry. If I had realized all of this sooner, that 17 megapixel point and shoot camera probably could have solved at least a couple of my problems. But I listened to what I had read. The internet is always right, isn’t it?
Alright let’s go back to our very simple checklist:
☒Completed artwork
☐Way to take a picture of artwork
☐Program to edit photo
☐Edit photo
☐Method to print (either a printer or company to outsource)
We have our artwork.
We’re going to insert a step in there. The next is really to do some thinking on what size you want your printed artwork to be. Take a minute to think about your goals with all of this. (You should honestly take more than a minute on this part, but at least for now a minute will do.) If you are only making card size prints it will matter a lot less what camera you are using than if you want to make 8x10s and up.
I realize that most, if not all, of the charts out there will tell you that you can make a great 8×10 from a 10 megapixel or less camera. I will disagree with this. I notice a big difference on works that contain a lot of details. If it was a picture of the sunset for example it would probably turn out fine, but for my graphite drawings using my scanner and produces results that aren’t way better than using my DSLR.
So now you need to assess what you have in terms of taking pictures of this artwork. If you don’t have a good camera, do you own a scanner? I have an all in one scanner, printer, copier and attempted to try this first. It’s terrible for pictures. Well, let me take that back. It has always been ok for copying a document, and I’ve even used it to create line art of some cartoon drawings. It has a purpose and does an ok job at that but creating fine art prints is not one of the things it does well!
If you try to research scanners for scanning artwork for prints a million different opinions come up. Some of the scanners recommended are very expensive. I would love to own a scanner that I could put my entire artwork piece on and just hit a few buttons and be done. I also would like to win the lottery. I would probably need to in order to justify spending $2500 on a scanner for a business that I just started!
After reading a lot of reviews and searching for what was available locally, I ended up with an Epson V39 Perfection. It cost me $80, I think it was on sale a little when I got it. It was the best $80 I’ve ever spent.
If you do not own a camera and would like to make prints of your artwork, I strongly suggest researching scanners. There are a lot of issues that come up with cameras that scanners do not have. Lighting and the size of prints you can make are the main issues.
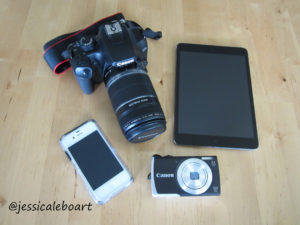
Here are a couple of picture examples comparing my camera to my scanner. Sometimes pictures just say more than words.
In the first comparison my scanner image is on the left. The most noticeable part is in the water. It looks very blended and blurry in the right photo, while the one that is scanned you can see the crisp lines.
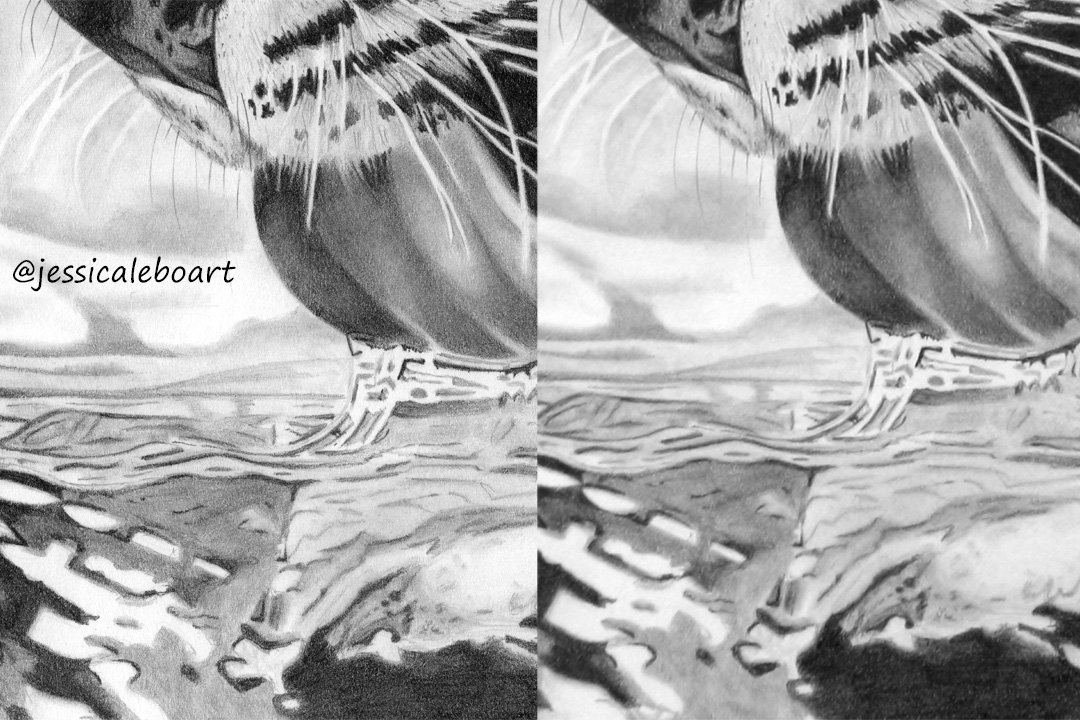
The second image my scanner image is on the right. It is really noticeable when you look at the fine details of the zebras’ hair. The camera also makes my black areas look very solid, while the scanner picks up on the tiny white areas that I didn’t quite cover with my pencils.
I have spent a lot of time comparing the differences between the photo quality between the two. But I’ll save you more droning on about that and just leave it at these two comparisons.
If you already own a camera that you think will work, don’t feel like you have to go out and purchase a scanner! I’m not saying that at all. A lot of people make it work with a camera. Some people produce amazing work. Some people don’t have a ton of issues like I did. (Some people actually have up to date equipment!) But if you ever get frustrated with the quality of the pictures, or frustrated with lighting issues, come back and consider this.
I learned so much about the other aspects of getting prints made while fumbling around with my camera, so all was not wasted.
Back to that checklist again:
☒Completed artwork
☒Way to take a picture of artwork
☐Program to edit photo
☐Edit photo
☐Method to print (either a printer or company to outsource)
We just crossed another item off. We just figured out the method we are going to use to get our pictures onto the computer!
The plan is to cover a basic camera setup in the next post, as well as a simple intro to scanning. I’ll also talk a bit about the two editing programs that I’m familiar with; Gimp and Photoshop.
Thanks again for joining me here! Please feel free to ask any questions and give your opinions below in the comments.
If you’re not subscribed to my lists and would like to be, hit the button below! I’m also all over social media, so please join me there!
SUBSCRIBE