Welcome!
This post is going to cover a basic setup for your camera, basic scanning, and then a couple of editing programs.
Below is an idea of what your set up should look like for a camera.

Your artwork should be straight up and down. The camera should be perpendicular to your artwork, aiming right at the center of the piece. If you are using lights they should be on each side, in line with the camera. In my research there are a lot of theories on which lights you should use with the only consensus being that they should be daylight bulbs. Some people say use four lights, some say two, some have them pointed at the opposite side of the artwork from where they are originating, some just straight on. This really is something you’ll have to play around with and test what works best for you. (I absolutely detest that advice by the way!) If there was a method that was foolproof for everyone there wouldn’t be so many varying methods out there. I found that using a few lights while the sun was bright in the room was the most helpful.
If you own an easel you can use that to hold your artwork. I use a piece of foam board that I tape my artwork to. Just be sure to use clear or white tape. NOT blue painters tape. Otherwise you’ll give yourself an editing headache later, or have to retake the pictures. Seems so obvious now, I know!
You want the artwork to fill the frame of the camera as much as possible. This will give you the biggest file to work with later. Remember all of that pixel resolution information I talked about in the last post? This comes into play here. If you have to crop off a lot of the picture to get rid of the excess, you lose that valuable space, limiting the size of your prints even more than your camera’s capabilities.
I do not own a tripod so I first used a stack of books to support my camera, but this didn’t allow the zoom on my lens to spin without moving the camera out of position. I solved this by using a rolled up blanket that was a correct height. Sometimes you have to just get creative with what you have on hand! I always used my self-timer to avoid any extra camera shake. The other camera settings are a bit boring to discuss, and I’m honestly not sure most of them made a difference. So I’ll skip that part. If you’re dying to know, please just ask and I’ll give you my opinions.
So then take a few pictures. I always took some and then changed my lights a bit and took a few more. I found it impossible to tell if the lighting was off until the photos were on the computer, and this gave me a few more options to work with.
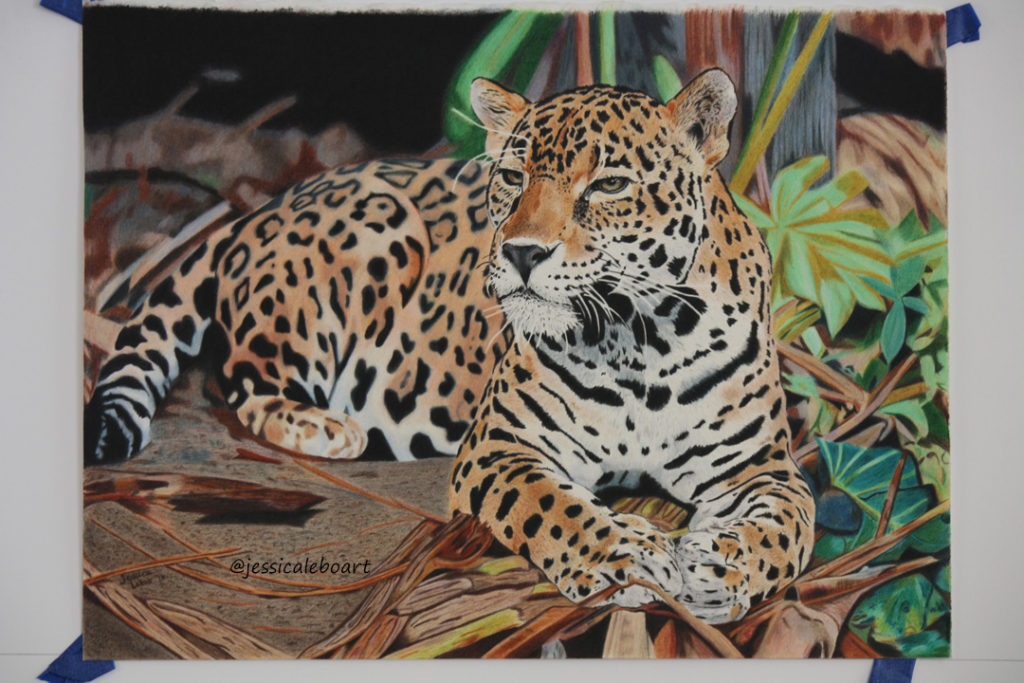
Lighting is such a difficult thing to try and write about to explain the issues you can have. But just google the issue and you’ll see how much of an issue people have with lighting. If you are taking pictures of a piece of work that is completely covered it is much easier, for example this was a very easy photo to edit because there were less chances to create very noticeable hot spots. (Notice blue painters’ tape… oops!)
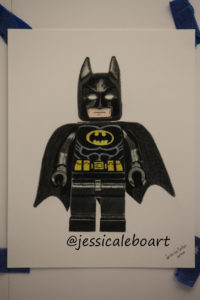
Also if you are planning to take the background away it can be easier, like I did in this Batman drawing. It was much easier to just cut out the drawing part and place it on a white background instead of trying to worry about even lighting.
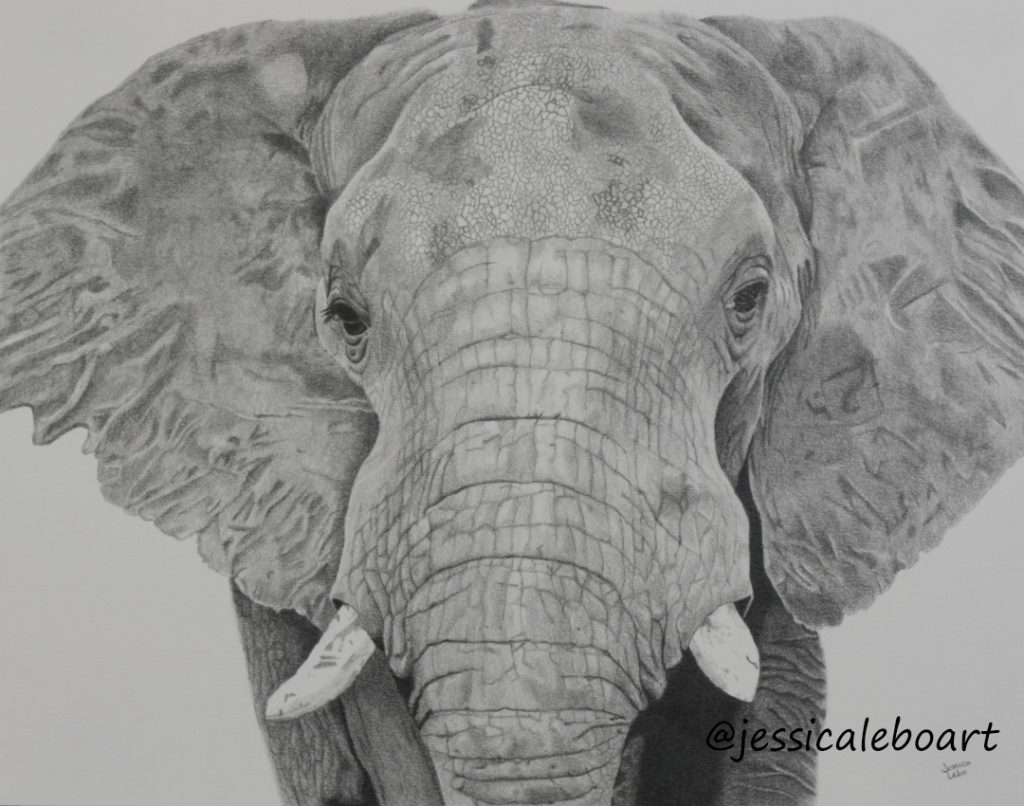
A photo I really struggled with was my elephant. I’ll demonstrate my issues with a few pictures. The first is the photo right off of my camera. The extra white space around the drawing is my foam board I mentioned. On this picture I could certainly have gotten a pinch closer with my camera. There is a bit of wasted space at the top and bottom of the photo.

The next picture is just a crop, eliminating the board and extra space. It’s still hard to see if there is going to be a lighting issue.
The next two pictures are edited. The first doesn’t look too terrible at first glance. But it’s not really finished being edited, the bright whites aren’t quite white enough.

But if you edit it to change the whites, you can really notice the lighting issue.

The entire background should be white, as it is in real life. In this picture the top corners are pretty good. They are white, but the bottom corners look like they are almost dirty. My light was hitting the paper unevenly causing them to show darker than they should have. One way to solve this is to edit out the background completely, which is not hard to do and an easy solution to the problem in this case. But it’s not always a good solution. Sometimes bad lighting can create unwanted color differences and I’m sure that can be edited out too, but that’s way too much work for me.
If it was easy to tell the moment you take a picture if the lighting was off, this whole process would be much easier. But it takes time to get to this point in the editing, just to realize you need another, better picture. Lighting is very important, use what you have and play around to see if you can find a good setup for you.
Little disclaimer: I’m a huge fan of my scanner. After months of struggling with photos, a scanner changed my way of working instantly. And although I love it and would never go back to a camera, I understand that many people use cameras, it works for them, and they love it. I’m not against cameras. I’m against them for me. I want to make that clear. Use what you have unless you are frustrated or want to change!
Scanning is pretty basic. You put the artwork in the scanner. Hit the scan button from your computer and let the magic happen.
What resolution should you scan at? I have no idea! I have tried scanning everything from 300-1200. I wouldn’t personally scan less than 600 for a print that I’m printing. Why? No good scientific reason really. I just only want to scan once, and I decided that 600 was going to be my magic number. Here is my (possibly flawed) logic on why. My printer prints at 300 dots per inch (dpi), so if I’m making exact size copies of my work, then 300 would be a good resolution to scan at right? Maybe, but have you ever measured an 11×14 piece of paper? It’s not quite 11×14 inches. After scanning and cropping to make sure it’s a perfect rectangle, my file is approximately 10.75×13.75 inches. So in order to print an 11×14 image, I have to actually increase the size of that file. This makes the resolution ever so slightly lower than 300 dpi. Well, after all of my experimentations, I’m now a bit paranoid. I don’t want to go through all of the effort to fix a mistake later. So I just scan higher than I need to. I’m willing to admit this may be flawed reasoning, but it makes me happy, and it hasn’t failed once yet so I’m sticking to it!
For comparison purposes here is the initial scan of my elephant. Pretty big difference from the first photo. The lighting is even. But it still needs some editing to get it to match the original.
Well, I think that covers getting the photos. We now have our images on the computer! If you have any questions or think I missed any steps, please feel free to ask.
The next step in our checklist is a program to edit the photo.
☒Completed artwork
☒Way to take a picture
☐Program to edit photo
☐Edit photo
☐Method to print (either a printer or company to outsource)
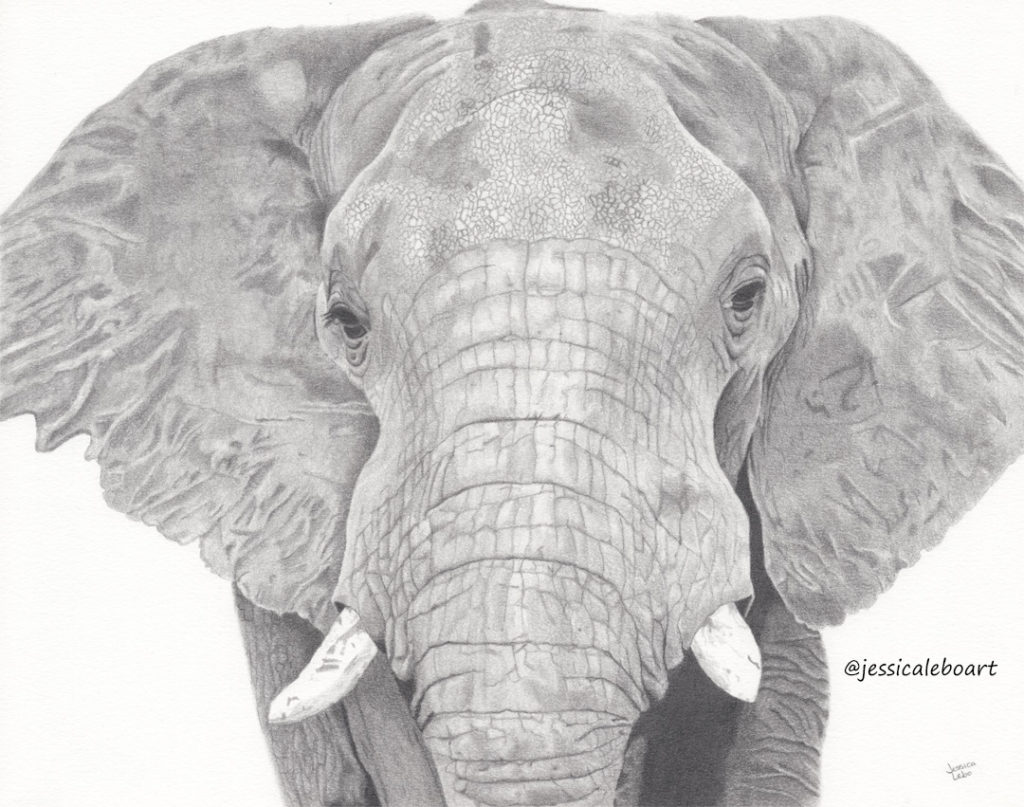
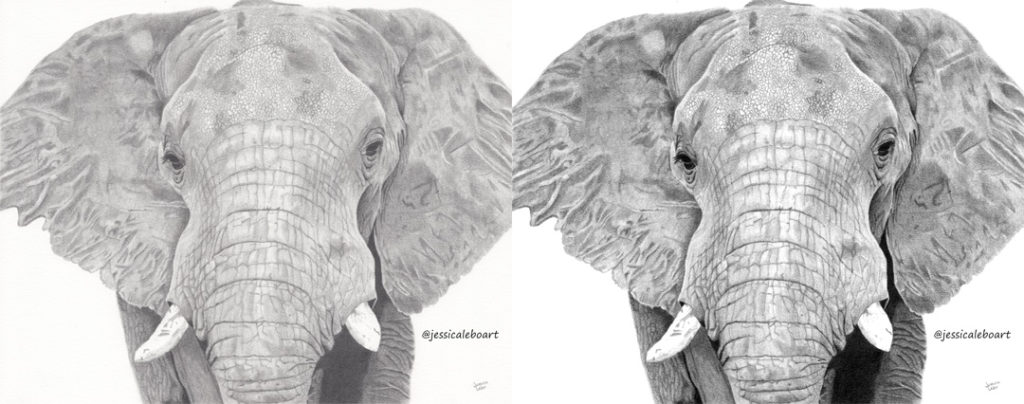
It would certainly be nice if you could take a photo, or scan your work and it would be ready to go. Unfortunately, that’s just not the case. You can see the examples of from my elephants compared side by side. The left is the initial scan, the right is the final edited version to match the original.
For photo editing, Gimp was the photo editing program I used when I first started editing. Although I had never heard of it before, I researched alternatives to Photoshop, and it was one of the top recommended free programs. If you are looking for a free program I would recommend it for sure.
I switched to Photoshop for printing purposes, but if you are trying to decide which program to use to edit, I don’t think you can go wrong with it. It is a very popular program and it’s very easy to find help when you can’t figure something out. Photoshop Elements runs somewhere between $80-100, I believe.
I personally found both programs to be a bit tricky to use. A bit tricky should probably read disastrously hard, but I’m admittedly not the most computer savvy person, so I may have struggled a bit more to start off than some. The good thing with both of them is that once you figure out how to do what you need, they are easy to use. There are really only a few steps and features you need anyway. Don’t let the programs themselves overwhelm you. Yes, they can do incredible editing, and some amazing things, but you really only need to know a few things to get your artwork edited. The other stuff can be ignored for now until you want to expand and play around a bit. I now enjoy using them to heavily edit some of my reference photos, as well as combining photos together, something I never dreamed I’d be able to do when I first started.
And that brings us back to our checklist:
☒Completed artwork
☒Way to take a picture
☒Program to edit photo
☐Edit photo
☐Method to print (either a printer or company to outsource)
We’re moving right along here. Next post will start into editing!
I’ll reiterate here that this is in no way a complete how to. I am excited to share what I’ve learned and the mistakes I’ve made in order to hopefully help and encourage others to get started. But there are a million correct ways to do the exact same thing. My way is just that, my way. It may not work for you. So take what does and apply it, and if it doesn’t work for you, throw the information out the window! But if you want to start making prints, you can do this! You just have to start! 🙂
Thanks again for joining me. As always if you have any questions or opinions please feel free to chime in!
If you’re not subscribed to my lists and would like to be, hit the button below! I’m also all over social media, so please join me there!
SUBSCRIBE